How to Use GarageBand to Make Your Own Ringtone on a Mac

Why Create a Custom Ringtone?
Some ringtones are available for free, but if the rights to the music belong to a musical artist you're most likely going to have to pay to download a ringtone of your favorite song. Going the DIY route allows you to grab the exact snippet of music you want to use for your tone-- plus, it's free. As long as you use the tone for your own personal use, you won't have to pay extra money to use the song as a ringtone. Also, if you make your own music you can use tunes that you've created yourself as ringtones.
Required Software
To do this you'll need:
- GarageBand 4.1.1 or better
- ITunes 7.5 or better
- an iPhone with software 1.1.2 or better
Step 1: Connect Your iPhone to Your Mac
Connect your iPhone to your Mac using the USB connector cord that came with your iPhone.
Step 2: Open GarageBand
Make a new project. The name of your project will be the name of your ringtone. Close the keyboard and delete the default track by selecting "Track" and then "Delete Track" from the top menu.
Step 3: Set Up Your New Track
Select "Track" and then "New Track..." from the menu. Pick the "Real Instrument" option.
Step 4: Enter Time Mode
Click the left side of the LCD screen to bring up a menu that shows GarageBand's different modes, and select "Time."
Step 5: Disable Metronome
From the control menu, disable the metronome to prevent it from playing when you sample your ringtone loop.
Step 6: Import a Song
Using Finder, navigate to the song file you want to import. Drag it into the GarageBand window to import it.
Step 7: Select the Portion of Audio You Want to Use For Your Tone
Enable cycle mode, then drag the cycle to include the portion of audio you want to use as a ringtone. Make adjustments as necessary to make sure that you get the selection you want to use as a tone.
Tip: You might want to play the cycle a few times to make sure that it sounds the way you want it to sound when the ringtone repeats.
Step 8: Ensure the Selection Meets Ringtone Criteria
Ringtones need to be less than 40 seconds long. Other types of tones (new mail, etc.) have a 30 second limitation.
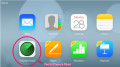
Step 9: Send the Ringtone to iTunes
From the "Share" menu, choose "Send Ringtone to iTunes."
Step 10: Sync the Ringtone
Now, pull up iTunes and click on the iPhone button. Next, select the "Tones" from the top menu. Check the circle for either "Selected tones" or "All tones" and sync your iPhone. When the sync is complete, you'll be able to select your custom ringtone from within the iPhone.
Note: If you encounter any problems or notice that the ringtone pane is dimmed, be sure that your software is completely up to date.
Step 11: Select the Ringtone
From Settings on your iPhone, go to "Sounds" and then "Ringtone." You'll see your custom ringtone listed there as an option.